Follow these steps to take a photo of a receipt in your Caary mobile app. To upload an existing photo of the receipt from your cameral roll, click here.
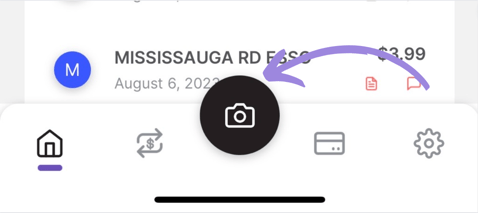
1. Log into the Caary mobile app and click the camera icon at the bottom of the homepage.
2. If you haven't taken a photo of a receipt before, you'll be prompted to allow access to your camera. Once your camera is open, position it to take a photo of the receipt. At the bottom of the screen, you can toggle between Normal and Long Receipt depending on the size of your receipt.
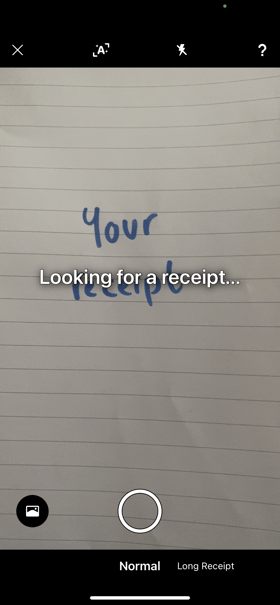
3. Once the camera is properly positioned to capture the receipt, you'll see the message Capturing, hold still!
-png.png?width=285&height=617&name=MicrosoftTeams-image%20(114)-png.png)
4. Review your photo to make sure it captures the entire receipt. If all looks good, click Done.
-png.png?width=286&height=619&name=MicrosoftTeams-image%20(112)-png.png)
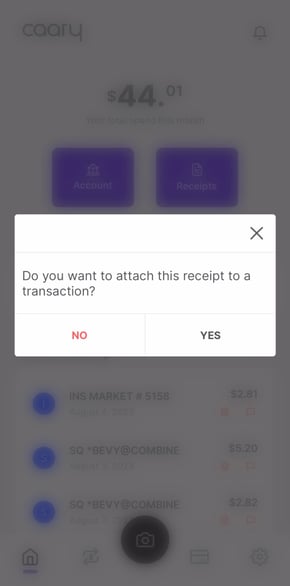
5. If you want to attach the receipt to a transaction, click Yes. If you click No, you can still add the receipt to a folder or transaction from the Receipts dashboard at any time.
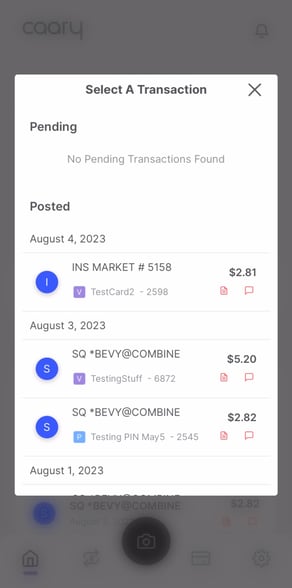
6. Select the transaction to which you'd like to attach the receipt.
7. You can update the description of the transaction for reconciliation purposes. When you are happy with the description, click Apply.

8. Success! You have successfully captured a receipt and attached it to a transaction. Your receipts can be accessed from your Receipts dashboard or the admin portal.